Designer Insights: 12 Steps to a Typical Kitchen Remodel Process

Typical Kitchen Remodel

Designer Insights: 12 Steps to a Typical Kitchen Remodel Process

The prospect of a new and improved kitchen is an exciting one, but taking the plunge isn’t always an easy decision. Our team at Bath + Kitchen, Washington, DC created this overview to help our clients understand what a typical kitchen remodeling process looks like based on our experience as a full-service design-remodel firm and authorized Dura Supreme Cabinetry Showroom.

Aside from the investment and inconvenience, two of the top fears around kitchen remodels are the fear of disappointment and the fear of being misled by a contractor. I believe these concerns should not hold you back from creating the kitchen of your dreams. Instead, I recommend doing your homework and learning as much as you can about the kitchen design process. When you understand the workflow, you will be in a position to collaborate successfully with your contractor and understand what’s happening at every step of your kitchen’s transformation.

See this video for a great example of a kitchen remodel project by Bath Plus Kitchen.

Step 1: Set goals for your remodel

What are you hoping to achieve through this kitchen remodeling project? Here are a few goals our clients often share with us:

  • Creating a kitchen that suits their lifestyle
  • Increasing resale value
  • Incorporating smart appliances to create a more future-friendly kitchen
  • Improving functionality, so home-cooked meals become an inviting option
  • Updating the space’s look, especially for older kitchens

Defining a goal will help you share your vision more clearly with your kitchen remodeling contractor. It helps to write it out as a goal statement and share it with everyone involved. You can then revisit the document at every step to ensure you’re on track and making choices in line with your vision. Very often, the remodel is planned with a big event on the horizon. For example, one of our clients in NW Washington, DC wanted theirs completed before their baby boy was born. We completed this kitchen remodel project with them in 8 weeks, just a few weeks before they welcomed the newest member of their family home.

Dura Supreme Kitchen design by Bath Plus Kitchen

Step 2: Evaluate your existing kitchen

With a clear goal in mind, you can approach your Dura Supreme kitchen designer and together you can evaluate your goals and your existing kitchen. If you’re not sure how to evaluate them, start with these questions. At the Bath Plus Kitchen showroom, our selection process is a curated one that’s designed to ensure each project is a good match for the homeowner and the designer. If you explain your goals clearly, it will be easier for the designer to tell you if they will be able to execute the project to your satisfaction and budget.

Once you have identified your kitchen remodel team, you will need to work with them to assess your current kitchen. The aesthetics are the first thing to evaluate. Ask yourself what you love about it and what you want to change. In addition, consider these factors:

  • Space – do you have enough counter, cabinet, and floor space?
  • Flow – is it easy to navigate, cook with family members, and interact with guests?
  • Appliances – should you upgrade to energy-saving, easier-to-use appliances?
  • Accessibility – can family members of various ages and use it safely, including yourself as you get older? What about people with disabilities?
  • Children and pets – do you need to make any special provisions for them?

Step 3: Design your dream kitchen

With a clear vision of your future kitchen, you can proceed to the fun part – designing! Yes, you will need to be realistic, stick to your budget, and make adjustments for any limiting factors, but a good kitchen designer can help you find creative solutions to give you a kitchen you will fall in love with. It’s important to be flexible and open to new possibilities during the kitchen design process. However, you should also stand firm on what you really want. For example, what kind of layout works for you? If you’re not sure what your options are, explore the pros and cons of some tried-and-true kitchen design layouts.

At our Bath Plus Kitchen showroom, I like to set up a meeting with prospective clients at this point. Prior to the initial visit, we ask our clients to email us the following:

  • Photos of the current kitchen.
  • Inspirational photos and/or a summary of goals and design aesthetic.
  • Rough measurements and/or a sketch of the existing kitchen.

During this initial appointment, clients will be able to:

  • Meet and interview one of our designers to explain the project goals, learn how we work, and determine if we’re the best fit for the project.
  • Touch, feel, see our cabinetry displays and samples. Our Dura Supreme Showroom features two kitchens and a remodeled bathroom to showcase our level of design and craftsmanship.
  • Settle on a rough budget for the project, depending on the size, scope, and level of materials required.

Once this is done, my designers go on to prepare plans for the job that include photo-realistic renderings for our clients. It’s a critical step because it will give you a clear picture of the kitchen you are planning.

Dura Supreme Cabinetry design by Bath Plus Kitchen

Step 4: Select your materials

Material selection is an integral part of the kitchen remodeling process. During this step, you will need to select materials that are functional, aesthetically pleasing, and that will suit your budget. Remember that this is an investment, and cutting corners here can make you unhappy with the final outcome. It’s essential to think long-term when it comes to choosing your flooring, appliances, cabinets, light fixtures, countertops, backsplash, and other kitchen elements.

That said, there are several incredible options to choose from that will suit your budget and needs. The Bath Plus Kitchen experts believe that kitchen cabinetry can make or break a kitchen design, which is why we offer fully custom and semi-custom cabinets from a top-rated manufacturer, like Dura Supreme Cabinetry. For example, many of our clients love the versatility of the Dura Supreme cabinets that we help them customize.

Dura Supreme Cabinetry shown in the Kips door style with the “Flint” Matte Foil and the Dash door style in the “Lodge Oak” Textured TFL

Step 5: Apply for building permits

Once the kitchen design plans are drawn up, you will need to apply for building permits. I work with clients from Virginia, Maryland, and Washington, DC, and know that requirements vary based on location. That’s why it’s always best to consult your local permitting office to ensure there are no oversights and potential code violations. Your designer can help provide you with advice and help you with this process.

Dura Supreme Cabinetry design by Bath Plus Kitchen

Step 6: Complete the demolition and re-evaluate

Here’s where the real work begins. Your remodeling team will start to remove your existing kitchen – floors, cabinets, appliances, and perhaps a few walls. A good team will minimize the mess and inconvenience, which will make a massive difference to you if you opt to live at home during this time. Once this is done, your team will inspect the kitchen to see if any adjustments need to be made due to unforeseen factors such as uneven floors and other construction flaws.

Flooring work in progress in a historic Washington DC home by Bath Plus Kitchen.

Step 7: Start the plumbing and rewiring (rough-in work)

This covers the framing, plumbing, and electrical work. At this stage of the kitchen remodeling process, the focus is on the walls of the kitchens and what goes into them. Since adherence to building codes is essential here, it’s important to let the professionals decide the best way forward. A professional inspection will happen once the work is done to ensure that your remodel is up to code so the project can continue.

A beautiful corner sink in a Dura Supreme kitchen designed by Bath Plus Kitchen

Step 8: Finish the walls, doors, and windows

Once you pass the inspection, you can complete the walls. This will entail hanging, taping, finishing, and priming drywalls. Doing a thorough job here will make the next steps of the kitchen remodeling process smooth sailing. After this, you can move to the doors and windows; finishing these will ensure your measurements for the kitchen cabinetry are correct.

Step 9: Complete the flooring

Contractors choose to do this at different points during the kitchen remodeling process. Some believe it works better if done after the cabinetry, while others recommend prior. We like to make a recommendation based on each project and its unique requirements. To decide on your flooring, look up a range of options for inspiration, from the classics to the trends.

Dura Supreme Cabinetry design by Bath Plus Kitchen

Step 10: Install the cabinetry, countertops, appliances, and fixtures

This is where things start getting exciting, as you begin to see your kitchen come to life! Those materials and elements you so carefully selected will be installed. Your new kitchen cabinets, countertops, kitchen appliances, plumbing, and electrical fixtures will all fall into place, allowing you to finally see your new and improved kitchen.

Dura Supreme Kitchen design by Bath Plus Kitchen

Step 11: Add the finishing touches

Once all the major tasks are completed, it’s a good idea to go back to your list and see what’s left. You can get these done and add the finishing touches. As mentioned earlier, the flooring may be put in last, so this last step will look a little different for different projects. I recommend taking the time to check all the little details before your contractor calls it a wrap.

Dura Supreme Cabinetry design by Bath Plus Kitchen

Step 12: Say hello to your new kitchen!

This is where you remember why you wanted a remodel in the first place! Step into your new kitchen and celebrate all the hard work and brilliant ideas that went into creating a space that you will love for many years to come.

Dura Supreme Cabinetry design by Bath Plus Kitchen

A kitchen remodeling project is a major undertaking. However, when well-executed, it offers you and your family a beautiful setting in which to make wonderful, priceless memories. That’s something I’ve enjoyed helping my clients experience throughout the years with the many kitchen remodeling projects throughout the Virginia, Washington DC, and Maryland tri-state area. Get in touch with your local Dura Supreme designer to start creating the kitchen of your dreams!

Credits:

Learn more about Bath Plus Kitchen at bathpluskitchen.com.

Want to Keep Your Kitchen Windows Sparkling Clean? Some Tips to Follow

The kitchen is one of the most utilized spaces in our home since we prepare and store our food in this specific area. Almost every kitchen has a window for ventilation purposes. With constant use of the kitchen, it’s more prone to specks of dirt and stains, requiring regular cleaning and maintenance.

Every now and then, the kitchen window needs proper cleaning. Otherwise, dust and grime will gather, preventing light from entering sufficiently and causing unsanitary environment. Besides, a dirty window can ruin the look of your kitchen area.

To keep your kitchen windows sparkling clean and let the light in correctly, you must follow some tips regularly and maintain them well.

Types of Spots on Kitchen Windows

Kitchen windows can get many spots, whether it’s an exterior-facing window, sliding window, awning window, or the old-school casement window that opens outward. Let’s break down the main types of window stains and spots:

  • Water passing through chalk, gypsum, or limestone absorbs high amounts of minerals, creating hard water. It makes spots on kitchen utensils, cookware, windows, and everything else it comes in contact with. For cleaning solutions, there are tips for removing hard water spots from exterior windows that you can try yourself. 
  • Oil splatters can leave stains on your kitchen windows, no matter where the windows are located. Micro oil droplets can travel through the air and attach on any surface in and around the kitchen, even staining your windows. And if you cook by the windows, the oil is likely to cause stains on your window surfaces.
  • Cooking fumes are another culprit of dirty kitchen windows combined with oil. The fumes will make your kitchen windows smokey if not cleaned frequently. 
  • Spots from glass cleaners and other cleaning solutions are very common across the household, so this requires special attention as well.

Tips for Sparkling Clean Kitchen Windows

There are remedies for every type of dirt and spot on your kitchen window. Routine maintenance will help you keep your kitchen windows sparkling clean. Let’s look closer into these remedies. These tips can help maintain the surfaces well if your kitchen and bathroom are new.

1. Hard Water Spots

Hard water can cover your kitchen windows on both sides if they’re located near the sink and facing the garden. If left unattended for too long, these stains can become permanent. 

The following tips can help remove hard water spots and maintain a stainless kitchen window. Take resort of your pantry for inexpensive yet effective removal of hard water spots on your kitchen windows.

DIY Remedies

  • Using lemon juice or vinegar will work well if your windows have just started staining from hard water. In a spray bottle, mix either lemon, vinegar, or both with water, shake well, and spray your windows. Let it sit for a few minutes, and wipe it off with a soft cloth. 
  • Baking soda is abrasive and works well for older hard water stains. Mix a teaspoon of baking soda in sparkling water or bottled mineral water to form a paste. Rub that all over the windows and scrub it off with a clean cloth. 
  • Using toothpaste on a small damp cloth can work well on small areas with hard water stains. 
  • Alcohol works well, too, when hard water stains appear on small areas, making it an easy and inexpensive way to maintain your kitchen windows.

Ways to Prevent Hard Water Stains From the Outside

While DIY remedies can help you remove hard water stains from either side of your windows and keep your windows sparkling clean, some additional steps can help you prevent these from the outside. Following is a list of a few things you can add to prevent stains on your kitchen windows:

  • You can hire a professional to install a layer of rain repellent. Although the name only mentions rain, this protective layer effectively guards your windows against dust, hard water, and other aggressive elements. Additionally, cleaning will also become more manageable. 
  • Fix leaky gutters and rain pipes around your house to ensure water doesn’t drip down your kitchen windows.
  • Add awnings to your kitchen and other windows as a surface layer of protection. 
  • If you’re strictly opting for routine cleaning with DIY solutions and not ready to invest in anything extra, you must maintain a routine. This way, your kitchen windows will remain stainless and will last longer.

Remember, these will work for every window in your house, not just those in your kitchen.

2. Oil Splatters

Greasy films are a common problem on kitchen windows due to the microdroplets of oil traveling through the air. You can easily clean them up using things already present in your pantry and laundry room. And if those don’t satisfy you, glass cleaning solutions will do the job perfectly.

DIY Solutions to Remove Grease From Windows

  • Mix equal parts water, vinegar, and lemon juice in a spray bottle and shake to mix them well. Spray this solution generously on the greasy window and window and wait for a few minutes. Using a clean cloth, wipe off the grease. 
  • If the windows have had oil splatters for quite some time now, you’ll have to repeat the previous process until all the grease is removed. As a final wipe, you can dampen a cloth with your prepared solution and wipe off the window and frame.
  • Dilute dishwashing liquid soap or degreasing detergent with some water in a spray bottle and spray the solution on the kitchen window and window frame. Scrub with a soft scrubber or an old towel to remove the grease. You may need to repeat this if there’s a build-up of a thick greasy layer.
  • You can also create a scrubbing using baking soda and some water. Rub it on the window and scrub it using a damp cloth. It should clear out tough grease on the windows successfully.

3. Cooking Fumes

Cooking fumes are another enemy to kitchen windows and anything else present in the kitchen. If you have a white kitchen, it’ll soon lose its luster due to the cooking smoke. It can also stain outside your kitchen, along with the grease and cooking smell.

Tips to get rid of cooking fume stains, whether just regular cooking fumes or very heavy ones, can help you maintain your kitchen windows and other parts of your kitchen and house. You can even use these to remove cigarette smoke stains in your house.

Cleaning Tips for Cooking Smoke Spots

  • Brush or wipe off the excess dust and grime on the windows created from the fumes. You can use a clean and dry microfiber cloth for this, or simply use a coarse cleaning brush. Cover up anything that you don’t want to mess up around that area for this step!
  • With a damp cloth, wipe off as much smoke stain from the windows as possible. You can use a wet sponge instead for this step. Removing the initial layer of smoke will help you clean your windows better.
  • Wash that sponge thoroughly and dip it in a soapy solution. Squeeze out excess water and clean the smokey window with it. Repeat this process until the windows are almost clean. You can also mix a squeeze of lemon to eliminate the odor accumulating in that smoke layer.
  • With a clean, damp cloth, preferably microfiber, give a few final wipes on the window and window frames, and your windows will be clean!

You can repeat these steps for other parts of your home with smoke spots. It’ll even work on cigarette smoke! Be careful with how much water you use, depending on the surface you’re cleaning.

4. Stains From Cleaning Solutions

Yes, even cleaning solutions meant to keep your kitchen windows sparkling clean can stain, especially with dirty clothes or wiping materials for cleaning. Or, if you treat the window spots with hard water, that will leave white, cloudy marks as well.

  • Use a clean microfiber cloth to ensure that the cleaning solution doesn’t get leave stains on the surfaces.
  • It’s better not to use tap water to prepare the DIY cleaning solutions or scrubs. Instead, use mineral water, filter, or simply boil some water before use to remove water hardness. 
  • Don’t let cleaning solutions dry on the surface you’re cleaning. Keeping on wiping until the solution dries off.

Additional Tips to Clean Kitchen Windows

To ensure the DIY kitchen solutions and scrubs work well to clean your kitchen windows in and out, it’s essential that you invest in a few things. While microfiber clothes and sponges can scrub off dirt and grime from the surface, the hard-to-reach spots need more intricate tools.

A squeegee is all the rage nowadays. Previously only seen with professional cleaners, this tool is also used at home. You can simply clean and wipe off the water and foamy solutions from the surfaces without leaving a single water droplet in sight.

Clean at least once a week if you want your kitchen to look good as new, even after two decades. This will also allow you to save cleaning time in the future.

Conclusion

With all the cooking, chopping and washing, every part of your kitchen can get stains, especially the windows. Windows don’t only allow proper ventilation but also let the light come in, allowing a brighter environment to work in.

Oil, cooking smoke, hard water, and many other things will stain your kitchen windows. With routine cleaning, you can keep your kitchen windows sparkling clean and avoid cleaning hassles in the future.

Top Seven Accessories to Improve your Kitchen Appearance

The kitchen has to be the favorite place for many people, especially for avid chefs that love cooking. Besides, the kitchen is a space where many spend a lot of time either fixing themselves something to eat or storing up vital consumables. Kitchen accessories alongside are the most vital parts of a kitchen set up and decide how effortlessly you can walk and work in your cooking space.
There are some key accessories when you are designing a new kitchen or renovating an existing one. While everyone would love to have a fully optimized and organized storage, the truth is, not everyone has the luxury of having a MasterChef style arranged in a hyper-organized setting to store their kitchen accessories.
So, if you’d love to upgrade your kitchen with a small budget and want to make sustainable choices, this is a must-read.

1. Update or Add Layered Lighting

A well-layered lighted kitchen improves its appearance – the emphasis here is on layers. While depressed ceiling fixtures ascertain general illumination, accessory lights function as an accent and cover the island. Upgrading it is a way to add style to your kitchen since it gives the first impression. You need not break a bank for a light fixture, but if you’re willing to splurge, you can explore a stylish chandelier.

2. Add a Focal Backlash

Backsplash, when harnessed appropriately, not only takes a lot of hits and heat but also doubles as the center of attraction, seeing it covers a good expanse of space. Adding a backsplash does wonder to amplify the feel of your kitchen. For something even more exciting, you should go for patterned ceramic tiles, particularly for a small space or a single wall that could make a big impact.

3. Create a Functional Island

Have your kitchen island play jack of all trades and multi-functional, including tailored elements to the basic unit. To get yourself an intensified storage and extra workspace, consider a shelving unit on one side and a table section at chair height on the other side at the end of the island, providing useful storage space for cutlery. You might also consider purchasing a new countertop with an overhang and adding legs extending your island without seating.

4. Pantry Unit

A definite must in every kitchen is the pantry unit. A pantry unit is regarded as a cupboard with a difference, storing all your non-perishable food products, groceries, bottles, jars, and other appliances. Although you can only customize the pantry unit based on the space available, it undoubtedly improves the style statement in your kitchen, particularly when you combine it with beautiful finishes, like sophisticated handles and lighting. 

5. Explore Wall Art Painting

Alongside wall paints, finding the perfect backdrop to complement your lifeless kitchen wall does not have to be overwhelming. Start with a theme with exemplary designs of your choice and step it up with other frames. For instance, the coffee painting by ElephantStock is a game changer for wall art paintings. This painting makes the corner of your minimalist kitchen stand out while maintaining the room’s simplicity. You can also check out other paintings that would suit your kitchen to create focal points, improve texture, add colors, and integrate elegance.

6. Change your Cabinet Hardware

Using a minimum investment of time and money, you have no idea what big an impact you can make by upgrading your cabinet hardware – talk about a quick and easy update that commands a colossal difference in the style of your kitchen. The best part is that you can change your cabinet hardware in just a few hours without spending much and yet transform your space’s entire appearance and atmosphere.

7. Use Cutlery Organizers

If your kitchen is modular, then a cutlery organizer is one important kitchen accessory you should have. Try out cutlery trays or a pull-out cupboard to display different-sized items stored in them, especially for deep but not too wide space. They all look sleek and can blend into your existing kitchen without a hitch. That being said, different cutlery stands, with partitions to display cutleries, are available for traditional kitchens.

Conclusion

Whether vintage, modular, contemporary, old French, or English, all kitchens have a lot in common. While most of these stylish and sophisticated items are expensive, you probably still have most of them on your to-do list for a kitchen revamp to suit your style. Instead of focusing on what you possibly can’t get, do what you have and still get the kitchen of your style on a budget. Good luck!

Care and maintenance tips for your new kitchen or bathroom

Care and maintenance tips for your new kitchen or bathroom

After a remodel, we like to share some important care and maintenance tips with our clients to help them look after their space well. Designing and building a new kitchen or bathroom that caters to your unique preferences and requirements takes a tremendous amount of planning, decision-making, and patience. When the project is complete and the space all cleaned up, you finally get to see what you and your remodel team were working towards. It’s hard to imagine your kitchen or bathroom looking better than it does at that point, with its gleaming countertops, spotless cabinet doors, shiny fittings, and sparkling clean appliances. After all, life – with its spills and messes – is bound to happen.

However, the pristine finish of your freshly-remodeled kitchen or bathroom can last a very long time with the proper care and maintenance. As a full-service design-remodel firm, we work closely with our clients to create spaces they will love for years. Through our comprehensive design process, we help select all the components of their dream kitchen or bathroom, so we know how important each one is to them. That’s why we ensure our clients have the best care and maintenance tips for every aspect of their new space.

CABINETS

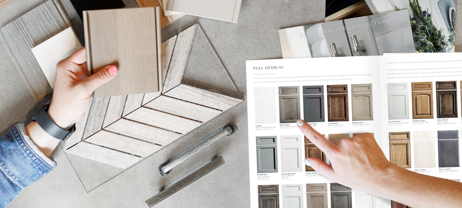
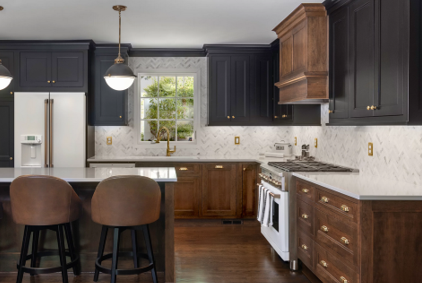
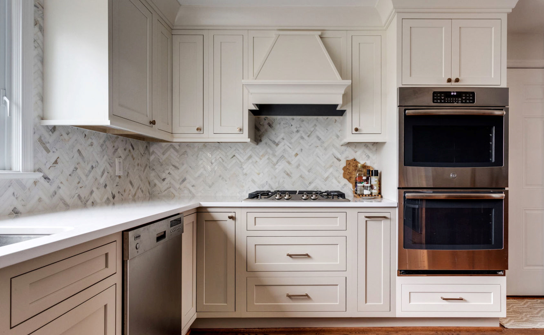
Cabinets vary tremendously in quality. In addition to the doors and drawer fronts, the quality of your cabinetry is determined by construction, including frames, drawer glides, and hinges. How well-made these components are will determine how long your cabinets will stay in perfect condition. Because we believe that cabinetry sets the tone for the entire kitchen, we offer our clients high-quality options from top-rated manufacturers in the US. These are designed to last and can look brand new for years with the right care, which means knowing how to maintain and treat them. Cleaning and making adjustments are two key parts of that:

1. Cleaning your cabinets

One of the best care and maintenance tips we can give you for your cabinets is this: question the product you’re considering using. Many products marketed specifically for cleaning cabinets can actually do more harm than good, as Plain & Fancy Custom Cabinetry explains in the video below. Watch it to see a demonstration of how to clean your cabinets the right way, without harmful products or water damage.

2. Adjusting your cabinet doors and drawers with ease

If you notice that any of your cabinet doors and drawers aren’t operating smoothly, you can adjust them quite easily with the correct method. Be sure to find out what works for the specific type of door and adjustment you are making before you start.

Dura Supreme, one of the manufacturers we work with, offers this series of hinge adjustment tips for different cabinet doors. Watch to learn how to access the adjustment screws and shift your cabinet doors and drawers as required:

Inset cabinet door with concealed hinges

Full overlay cabinet door

Frameless cabinet door

Lift door

Stay lift door

Drawer adjustment

https://youtube.com/watch?v=cCiZNlWctx4

Remove and re-install drawer or roll out

NATURAL STONE

Natural stone countertops

Sealing your natural stone countertops every 6 months is recommended. However, you may need to do this sooner. A care and maintenance tip that will serve you well is this: a good way to tell if it’s time to seal your countertops is if you notice that any water on the surfaces has started taking longer to dry. Eventually, over time, the stone will absorb the sealer and you won’t have to seal anymore, but that takes years.

Products such as this natural stone cleaner and sealer can help you keep your countertops in great shape. They are designed to work on natural stones such as granite, marble, travertine, and limestone, and will protect them against commonly spilled substances including oil, coffee, wine, and other food items. Take a look at this sealer guide by Black Diamond Stoneworks to learn how different products can work on your countertop.

For more countertop care and maintenance tips, take a look at this video by Marble.Com:

Natural stone tile and grout

Natural stone tiles, being very porous, can stain easily. That’s why it’s essential to ensure they are properly sealed. It’s also why they require extra caution when it comes to grouting. Ceramic tiles, for example, don’t require too much caution while grouting because the grout can be easily wiped off. Natural stone tiles, on the other hand, won’t be as easy to clean. This step-by-step instructional video on grout cleaning and sealing has some essential care and maintenance tips, and will show you the right way to go about it:

We also recommend getting a grout care package, such as this one by Black Diamond that includes a cleaner, sealer, and brush: http://amzn.to/2dMMWOt

GLASS

Glass stovetop

Worrying about cleaning your stovetop should never hold you and your family back from comforting home-cooked meals and fun culinary experiments. Your new kitchen should be a place where you want to spend more time with the people at home, creating old favorites and testing out new recipes. Even the most stubborn, burnt-on spills can be cleaned gently and effectively using this easy method:

Shower glass

One of the first things to make a bathroom look uncared for is a water-stained shower glass.  A solution of 5 parts vinegar and 1 part water works well to keep it spotless. For more on keeping your bathroom looking its best, take a look at this video by Clean My Space:

MISCELLANEOUS

Metal fittings and hardware

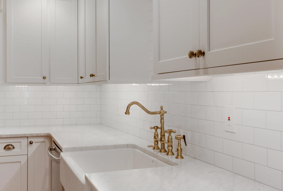
Take care to clean drawer pulls, door handles, faucets, and other frequently-used fittings and hardware with the right material. Frustrating hard water stains might make you want to reach for something tough like a brillo pad, but try a microfiber cloth instead – it will do the job perfectly without scratching the finish.

Backsplash

The material you have selected for your backsplash will determine the appropriate care and maintenance required. Natural stone, as mentioned above, will need to be treated with more care than, say, a steel or glass backsplash. But, regardless of material, try to clean your backsplash regularly to keep your kitchen safe from mold and mildew. Remember to use a sealer as needed.

Appliances

It’s easy to forget about appliances that run all the time, such as refrigerators and freezers. That’s probably why they are not featured amongst frequently shared care and maintenance tips for kitchens. Without proper maintenance, these appliances could fail faster than they should. Clean the compressor coils to prevent them from running too hot for too long. For stoves and microwaves, the enemy is food build-up. Keep them clean so they work smoothly. Similarly, dishwashers need to be kept clean and debris-free. In addition, you must ensure they are sealed properly. Check the door gaskets to make sure everything is set up to work well.

Common mistakes to avoid making with your new kitchen or bathroom

  1. Not waiting for protective treatments to take effect. If you are doing the required maintenance on your countertops or bathroom tiles, be sure to follow the instructions completely and wait until the surface is safe for use again.
  2. Not fixing or replacing your appliances if you notice an issue with them. A faulty appliance could damage your home’s electrical system, so it’s important to address any issues there without delay.
  3. Ignoring loose tiles. Cracked tiles open up the floor to rot. If any tiles get damaged, attend to the grouting at the earliest possible.
  4. Using unsuitable and damaging cleaning methods. In this blog, we have looked at a few ways to clean different components of your space. This is because, quite often, people are not aware that certain cleaners (even when they are marketed for a certain use) can do lasting damage. Always look for the right method for each material or surface before you clean, and do a spot test first.
  5. Not calling a qualified professional to take care of a maintenance issue when needed. Sometimes, leaving it to the experts is the best idea, especially when it comes to certain repairs, modifications, and protective treatments. If there’s something about your kitchen you’d like to fix or modify, it’s best to consult an expert before you go the DIY route.

    A note on proper sanitization practices for your new space: In recent months, many of us have incorporated a sanitization practice for our kitchen, bathrooms, and other common areas of the home. While this is advisable for health and safety, using the wrong products can damage surfaces. To help you avoid this, we compiled some tips for sanitizing different surfaces and other practices to ensure home safety for your long-term wellbeing.

    Every kitchen and bathroom we work on at Bath Plus Kitchen has a customized design that incorporates a range of materials. We know it’s tough to think of everything while caring for them. We hope the care and maintenance tips in this quick guide help you find the best way to look after for each component of your beautiful new space, so you can enjoy the feeling of a just-remodeled kitchen or bathroom for longer!

    Key references:
    https://www.durasupreme.com/
    https://cleanmyspace.com/
    https://www.doityourself.com/
    https://www.hgtv.com/
    https://www.youtube.com/